
Hi there – I’m Jaime from MadeByJaime.com! I’ve been sewing since I was 15 years old, mostly making garments. After highschool I went on to earn a Bachelor’s Degree in Home Economics (yes, when that degree still existed!) with an enphasis in clothing & textiles. After graduation, I worked at a quilt shop where they taught me the ins and outs of cutting and assembling quilts. I then did a short stint in the bridal industry, but desiring a more family friendly schedule, I moved on to a non-sewing-related 9-5 but I never stopped sewing!

I’m so excited to share this Quilt Pattern with you. This was the quilt I cut my teeth on during my first class at the quilt shop and I’ve been dying to write it up for others to enjoy. I love making them for a new baby because it’s larger than your average 36″ square baby quilt and will last them as long as they love it. It’s also great for anyone as a lap quilt! I will outline the tutorial here, but you can also get a free PDF download of the instructions, including tons of tips for beginners and extra tutorial notes, by CLICKING HERE.
Beginner’s Quilt Supply List
- 1/4 yd each of 6 fabrics OR 6 fat quarters for squares
- 5/8 yd for border
- 1 1/2 yd for backing
- 1 crib size (45” x 60”) packaged batting or
equivalent yardage - Embroidery Floss or Thin Yarn for tying
- Neutral or Matching 100% Cotton Thread
- Chenille Hand Sewing Needle
- A sewing machine
- Quarter Inch Foot
- Rotary Mat & Cutter
- 8.5” x 24” Quilter’s Ruler
Variation:
This quilt was originally intended to be finished using the envelope/pillowcase method and hand ties. If you prefer to finish with machine quilting and binding, leave off the Embroidery Floss/Thin Yarn & Chenille Needle and add the following
supplies:
- 3/8 yd fabric for binding
- Matching 100% Cotton Thread for Machine Quilting
Making the Quilt Top
- Make sure your fabrics are pressed and ready. Grab your border fabric and cut five 4” strips by the width of the fabric (WOF).
- Cut one of your 4” strips in half and sew each half-length strip to two of your full-length strips by laying your full-length strip right side up and placing your half-length strip face down on the end, perpendicularly to make an L shape. Pin. Mark a diagonal line and sew. Then trim the seam to 1/4” and press open. Set aside all border strips.

- From each of your 6 fabrics, cut a 7” strip by the width of the fabric. (If you are using fat quarters, cut two 7” x 22” strips from each fat quarter.)

- Cut 7” squares from each 7” strip of fabric. You should get six 7” squares from each fabric.

- Lay out your squares to see how you will sew the quilt together. This can be done randomly or by placing each print in rows diagonally. There should be 5 squares across and 7 squares down. You will have 1 extra square.

Tip: Write Row 1 through Row 7 on scraps of paper and pin each label to the first square in each row just so you don’t get turned around!

- Prepare your machine with 100% cotton thread and a new needle. Place the first two squares in Row One right sides together (face to face) and sew together down one side with a 1/4” seam. Continue to sew together the remaining squares in Row One. Do the same for the remaining rows to create 7 rows.
- Press all the seams in Row One in the same direction (for example, all to the right). Then press the seams in Row Two the opposite direction, continuing to press the seams in each row in alternating directions until all seams are pressed.

- Place Row One right sides together with Row Two. Pin each seam junction, butting up the alternately pressed seams against each other to make sure your corners line up. Sew together with a 1/4” seam. Press the seam to one side.

- Continue sewing each row to the next in the same way, remembering to pin each seam junction, sew with a 1/4” seam and remove your pins before sewing over them. Press each row seam to one side.
- Lay your quilt on a flat surface and measure the length through the center. Write down the measurement. Now, cut your two long, pieced-together border strips to that measurement. (From Step 2)

- Place the newly cut border strips face down on each side of your quilt, aligning raw edges. Pin and sew the borders on with a 1/4” seam, removing pins as you sew.

- Press the border seams toward the border and lay your quilt again on a flat surface. Now measure the quilt width through the center and write down the measurement. Cut your two remaining border strips to this measurement.

- Place the newly cut border strips face down on top and bottom edges of your quilt, aligning raw edges. Pin and sew the borders on with a 1/4” seam, removing pins as you sew.

- Press your border seams toward the border and admire your finished quilt top. Can you believe it!? You’re almost finished!


If you plan to layer, machine quilt and add binding, this is the time to do it! For your first quilt, you might try the envelope/tie method outlined below.
Finishing
- Lay your batting on a flat surface. Lay your pressed backing fabric right side up on top of the batting. Finally, center your quilt top right side down on top of the batting/backing. Pin all three layers together around the edges, placing your pins perpendicular to the quilt top edge.

- Sew all three layers together using a walking foot and a 1/2” seam from the edge of your quilt, making sure to leave a 6-8” opening for turning the quilt inside out and backstitching at the beginning and end.

- Trim the quilt layers to match the quilt top. Trim slightly across corners and turn your quilt inside out.

- Press your quilt edges to achieve a crisp edge for topstitching, making sure the seam is completely turned out and there are no folds in the edge.
- Pin your opening closed, then topstitch 1/4” all the way around, still using your walking foot.

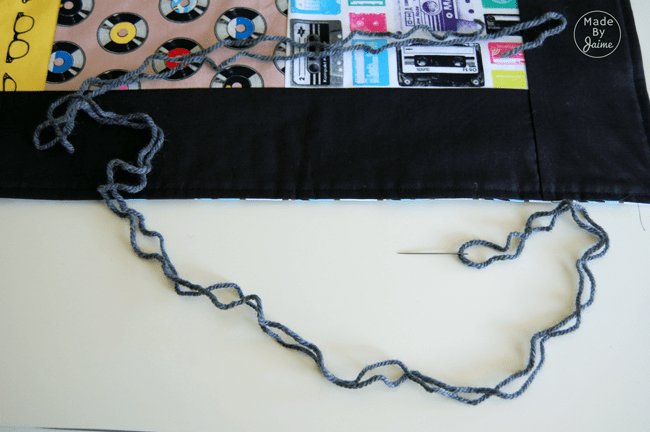
- Thread your embroidery floss/yarn onto your Chenille needle with a long double tail.

Start in one corner of your quilt, going diagonally through the corners. Pull through so the tail is about 1/2 as long as the square you started on.
 Do not cut the thread, but just keep going from corner to corner for as long as you can go with the length of thread you cut, making sure to leave at least a 1/2 square length tail at the end. Rethread and continue sewing through each corner until every square corner has a tie through it.

- Cut the thread trail between each square halfway between.
 Then tie a double knot. Trim each tie to 2 finger-widths and you’re DONE!

Congratulations!!


If you’d like to see this quilt made up in different fabrics, check out my post here and here. And don’t forget to download your copy of the PDF Tutorial with tons of tips for beginners and extra tutorial notes! If you make one be sure to share on my Facebook page, Made By Jaime.
