Swimsuit Sew-Along: Pattern Alterations
This post is one part of a Swimsuit Sew-Along series! If you missed the previous posts and would like to join in, just click below! Swimsuit Sew-Along Announcement Your Machine The Pattern Fabric Notions Checking In This past weekend was my little girl’s 2nd birthday and we had a blast! I will have to blog…
This post is one part of a Swimsuit Sew-Along series! If you missed the previous posts and would like to join in, just click below!
This past weekend was my little girl’s 2nd birthday and we had a blast! I will have to blog about it after the swimsuit sew-along is finished because there was so much DIY – her dress, her cake, and some of the decorations. All that plus the cleaning and the crash & burn afterwards left me without a post yesterday but here we are – house back in order, re-energized and ready to get back at it!
After some interactions with you regarding my check in post, I now know that everyone is in a different place. Some are drafting their own pattern from a tutorial and want to be done by Wednesday. Some are a little behind in reading the posts but plan to catch up. Another had some questions about some possible alterations for her chosen pattern. So I will move forward because even if you don’t sew along this year, these posts will be here for you whenever you’re ready. Isn’t the internet glorious?!

Swimsuits are so great to sew up because lycra is forgiving in regards to fit and if you’ve chosen a pattern with a general structure that you like, there is not much that needs to be altered. However, sometimes we want a different strap or a little more structure inside and need to alter the pattern ahead of time for these style changes. I’ll talk about alterations for fit today and discuss alterations for style in the next post.
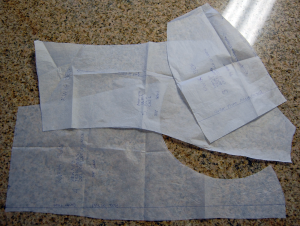
If you want to preserve the original pattern, the first thing you need to do is transfer your pattern to tissue paper or pattern cloth, transferring all lines and markings. If you are cutting your pattern directly, roughly cut around all the pieces and press on the lowest setting to get them as flat as possible. If you are using a .pdf pattern, you can print that puppy out as many times as you need so just tape it together and rough cut around the pieces – they should be flat already.

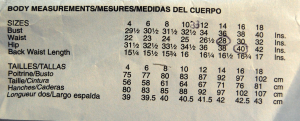
Next you want to compare your measurements to the measurements they used to make the pattern. This is the chart we used back in the fabric post to determine how much fabric to buy. The last suit I made (Kwik Sew 3779) had great instructions. The first few steps took you through this process, discussing each part of the suit and giving you the pattern measurement for back waist length and crotch length for you to compare. It even provided diagrams for how you might alter for the differences in measurements! If your instructions are not that involved, you can simply compare with the measurement chart and make alterations accordingly. There are generally horizontal lines on the pattern designated for lengthening and shortening. If you tend to be short or long waisted, this is where you will add or subtract length.

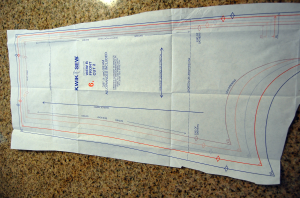
Being a pear shape myself, my number one alteration has to do with blending sizes. I am typically one size on top and another on the bottom. This is where the multi-sized patterns come in so handy! If you are tracing your pattern, simply choose a point at which to start and end your transition from one size to the next. You want to be somewhat exact here, on front and back pieces, since this blending can change the length of the seam and cause your top/bottom edges not to line up correctly. Use a hip curve or other type of drafting ruler to provide a uniform & smooth line between sizes. If you are cutting out the pattern directly, be sure to use the same process: pick a point to start and end the transition and draw a uniform and smooth line from point to point.

Piggy-backing on the last point, be sure and pay attention to the swimsuit’s seam allowance. Often for knits, the seam allowance is reduced to 3/8″ or 1/4″ instead of the standard 5/8″, but if you’re blending patterns or for any reason feel the suit may be too snug, you can always cut a bigger seam allowance to leave room for letting out.
One thing I’m always concerned about with my suits is the shape of the leg hole. Be sure to study the model to see where this part of the swimsuit lands on her. If you’re concerned, draw the side seam down an inch or two and blend the curve back into the pattern (on both front and back pieces). Mark the original cutting line on your fabric so you have an idea of where to return if the adjustment is way off. You can always trim this part of the swimsuit after you’ve sewn it up, but you can never add. This principle could apply to any part of the suit you are concerned with having the coverage you desire.
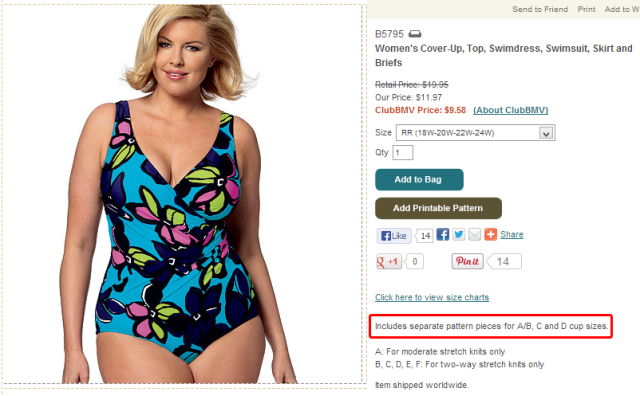
Another common fit issue that comes to mind is that some patterns allow for different pattern pieces for different bra cup sizes. Be sure you pick the right pattern pieces for your intended cup. One question that did come up in email was the ability to add bra cups to suits that do not call for them. This is entirely possible and something I will cover in my next post. Since we are making our suits, these are just the type of things we can do to add comfort and support according to our preferences.

Alteration possibilities are endless! While I’m trying to cover the basics here based on my experiences, if there is a fit issue that comes up you would like to address before cutting your fabric, please let me know and I’ll message you, or anonymously cover it here or on facebook. See you at our next post where we touch on alterations for style purposes!

4 Comments
Comments are closed.